Rabbit and black sausage with prunes

Standard

The other day my housemate came back from the butchers with a whole rabbit. The butcher was also kind enough to give him a free pack of black sausages, so after checking the cupboards I came up with this! Rabbit and prunes is a classic combination and the black sausage along with a generous amount of red wine added even more to the richness of the dish. An excellent autumn stew which was delicious with my garlic crushed potatoes (which can be found here), but just as nice with plain boiled rice!

Serves 4

Ingredients

  • 1 large rabbit, jointed (roughly 1.5kg)
  • 2 tbsp plain flour
  • 2 tbsp vegetable oil
  • 1 onion, finely chopped
  • 2 carrots
  • 2 celery sticks
  • 1 garlic clove, crushed
  • 3 rashers streaky bacon
  • 150ml red wine
  • 250ml chicken stock
  • 4 black sausages, cut in half
  • 250g stoned prunes
  • salt and pepper

Method

  1. Heat oven to 180C/160C fan/gas mark 4.
  2. Heat the oil in a large plan. Dust the rabbit pieces in the flour, generously seasoned with salt and pepper.
  3. When the oil is fairly hot brown the rabbit, two or three pieces at a time, and set aside.
  4. Peel and chop the carrots into 5mm pieces. Cut the celery into pieces of roughly the same size. Slice the bacon into 1cm strips.
  5. Add the bacon, onion, carrot, celery and garlic to the oil and fry for five minutes over a medium heat until starting to colour.
  6. Add the wine, scraping all the sticky bits off the bottom of the pan.
  7. Return the rabbit to the pan, coating it with the other ingredients. Pour over the stock, cover and place in the oven for one and a half hours, stirring occasionally.
  8. Remove the pan from the oven. Stir in the prunes and black sausage. Season and return to the oven for half an hour or until the rabbit is very tender.

Garlic crushed potatoes

Standard

I made these to go with my rabbit and black sausage with prunes recipe (which can be found here) although I have made them many times before. You can use any cheap potatoes to make these, which makes it great when you’ve spent all your money on the main. This is a particularly good recipe for those less attentive cooks, as the idea is to overcook the potatoes at both stages of cooking!

Serves 4

Ingredients

  • 1kg small potatoes
  • 4 shallots
  • 8 garlic cloves, crushed with skin on
  • 1 tbsp vegetable oil
  • 1 tbsp olive oil
  • 1 tbsp balsamic vinegar
  • salt and pepper

Method

  1. Heat oven to 200C/180C fan/gas mark 6.
  2. Wash the potatoes. Leave the skin on and cut each in half. Peel and halve the shallots.
  3. Place the potatoes in a pan of boiling water for fifteen minutes or until the potatoes are soft (a sharp knife should pass straight through).
  4. Put the vegetable oil in a large baking tray and place in the preheated oven.
  5. Turn off the hob and drain the potatoes. Return them to the saucepan with all the other ingredients. Season generously.
  6. Put a tight fitting lid onto the saucepan. Making sure you hold the lid down tightly, vigorously shake, bashing all the ingredients together and slightly crumbling the potatoes.
  7. Spoon the contents into the baking tray and return to the oven to cook for thirty minutes, or until the potatoes are crispy and brown.

Lemon cheesecake with summer fruits coulis

Standard

This quick and easy recipe requires no cooking, and produces an absolutely delicious cheesecake! Marscapone is significantly more expensive than cream cheese (which is used in most cheesecake recipes). However, it gives a much richer taste and a silkier texture. I made this for a group of friends and they all loved it!

Serves 8-10

Ingredients

  • 10 digestive biscuits
  • 75g butter, melted
  • 1 tbsp clear honey
  • 700g mascarpone cheese
  • 2 lemon, juice and zest
  • 200g caster sugar
  • 4 tbsp icing sugar
  • 450g frozen summer fruits, defrosted

Method

  1. Brush the bottom of a 23cm cake tin with some of the melted butter and line the base with greaseproof paper.
  2. Crush the biscuits and tip them into a bowl, add the melted butter and honey and stir until well combined.
  3. Tip the mixture into the bottom of the cake tin. Using the back of a spoon, gently push the crumbs from the centre outward, until smooth and level.
  4. Mix the mascarpone cheese, lemon juice and zest and caster sugar together in a bowl until well combined. Do not mix the mixture too much as this will cause it to split.
  5. Spoon the mixture into the tin on top of the chilled biscuit mixture and chill in the fridge for at least two hours.
  6. For the sauce, blend the fruits with the icing sugar in a food processor until smooth. Pass the sauce through a sieve.
  7. When ready to serve, either run a hot cloth or blowtorch round the outside of the tin and ease out the cheesecake.
  8. Drizzle over the coulis and serve.

Original recipe taken from here.

Banoffee cake

Standard

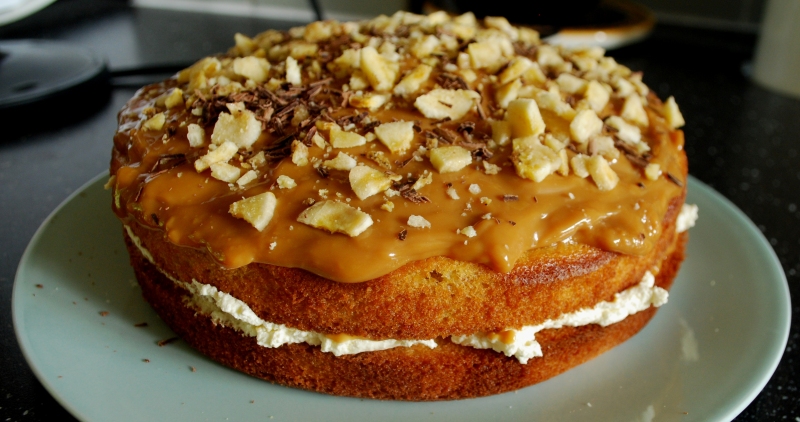
I made this cake for a friend’s twenty first. I find banoffee pie can be overpoweringly rich and turning into a cake somehow seemed to make it less sickly. I used a recipe to create the sponge, but used my own filling and topping. I love banana loaf (one of many great ways to use overripe bananas!) and just a little extra time and effort turns it a delicious cake!

Ingredients

  • 165g butter, plus extra for the tin
  • 165g soft light brown or light brown muscovado sugar
  • 325g self-raising flour
  • 1 tsp baking powder
  • 1 tsp ground cinnamon
  • 4 large eggs
  • 4 tbsp milk
  • 2 ripe bananas
  • 150ml double cream
  • 397g can Carnation caramel
  • handful dried banana chips
  • 2 squares of dark chocolate

Method

  1. Heat oven to 190C/170C fan/gas mark 5.
  2. Grease and line the bottom of two round 21cm loose-bottomed cake tin.
  3. With a wooden spoon or electric mixer, beat the butter and sugar together until smooth and a pale, creamy colour.
  4. In a separate bowl, sift together the flour, baking powder and cinnamon.
  5. One at a time, beat each egg into the butter mixture along with a tbsp of the dry mixture, then beat in the milk and fold in the rest of the dry ingredients until well combined.
  6. In the bowl that contained the flour, mash the bananas until smooth and lump-free – whizz with the electric mixer if needed – then fold into the rest of the mixture until well combined.
  7. Spoon half the mixture into each tin and smooth over the surface. Bake for thirty minutes, until a skewer inserted into the centre comes out clean. Leave to cool for five mins, then remove from tin and continue cooling on a wire rack.
  8. Whip the cream until it forms stiff peaks. Spread this over the top of one of the sponges. Sandwich the second sponge on top.
  9. Spread a generous layer of Carnation caramel onto the top of the cake.
  10. Crush up the banana chips, shave the dark chocolate and sprinkle both over the cake.

Original recipe taken from here.

Chilli con carne

Standard

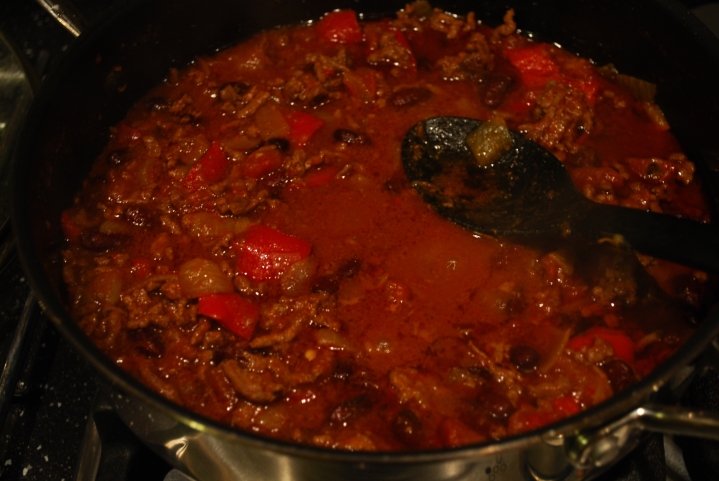
This easy recipe makes a delicious chilli. Perfect with boiled rice, but even better served in wraps with cheese, salad, guacamole, salsa and soured cream. The secret (and surprising) ingredient is the small amount of chocolate. It should be a piece of dark chocolate but I often use a Galaxy from a Celebrations box to save buying a whole bar!

Chili con carne

Serves 4

Ingredients

  • 1 tbsp vegetable oil
  • 1 large onion
  • 1 red pepper
  • 2 garlic cloves, chopped
  • 1 tsp chilli powder
  • 1 tsp ground cumin
  • 1 tsp paprika
  • 500g lean minced beef
  • 300ml beef stock
  • 400g can chopped tomatoes
  • 1 square of dark chocolate
  • 2 tbsp tomato purée
  • 400g can red kidney beans

Method

  1. Cut the onion into 5mm squares. Cut the red pepper into 1cm squares.
  2. Heat the oil in a large saucepan. When hot, add the onions and cook for five minutes or until squidgy and slightly translucent.
  3. Add the garlic, red pepper, chilli powder, paprika and ground cumin. Give it a good stir, then leave it to cook for another five minutes, stirring occasionally.
  4. Turn up the heat and add the mince to brown. Stir and prod for five minutes until all the mince is uniform and there are no more pink bits.
  5. Add the beef stock and the can of chopped tomatoes to the mix.
  6. Add the chocolate and tomato purée and season well.
  7. Bring the whole thing to the boil, give it a good stir and put a lid on the pan. Turn down the heat until it is gently bubbling and leave it for twenty minutes. You should check on the pan occasionally to stir it and make sure the sauce doesn’t catch on the bottom of the pan or isn’t drying out. If it is, add a couple of tablespoons of water and make sure that the heat really is low enough. After simmering gently, the saucy mince mixture should look thick, moist and juicy.
  8. Drain and rinse the red kidney beans in a sieve and stir them into the chilli pot. Bring to the boil again, and gently bubble without the lid for another ten minutes.
  9. Taste for seasoning and serve.

Original recipe taken from here.

Spicy falafel

Standard

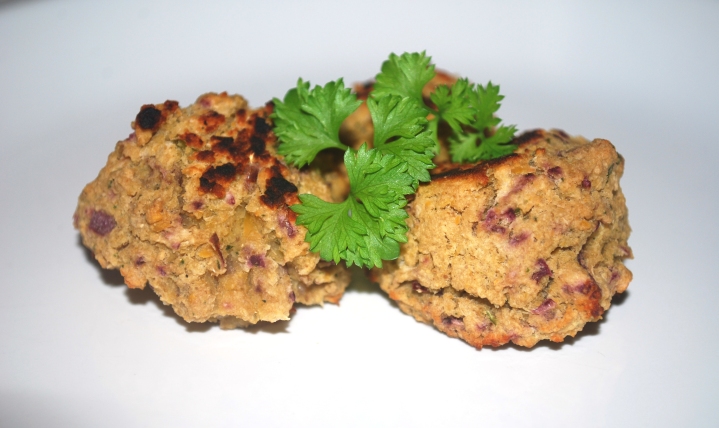
I decided to make a big batch of falafels the other day. They can be whipped together in about fifteen minutes, shaped and then frozen to be cooked when required. I tend to have them for lunch in pitta bread with hummus, lettuce, tomatoes, onion, sesame seeds and sweet chilli sauce. I used a fresh chilli instead of the chilli flakes and powder suggested in the original recipe. Delicious and very healthy I would imagine!

Spicy falafel

Serves 8

Ingredients

  • 1 tin chickpeas
  • 1 red onion, finely chopped
  • 2 garlic cloves, crushed
  • 1 tsp ground cumin
  • 1 tsp ground coriander
  • handful mint leaves, chopped
  • 1 chilli, finely chopped
  • 2 tbsp plain flour
  • 2 tbsp fresh parsley, chopped
  • salt and pepper
  • vegetable oil to cook

Method

  1. Heat oven to 200C/180C fan/gas mark 6.
  2. Blend all the ingredients, except the oil, together into a fine mix.
  3. Season with salt and pepper.
  4. Form into balls, place on baking sheet and press down lightly. Brush with a tiny amount of vegetable oil, and bake for twenty mins until they are hot in middle and crisp.
  5. Alternatively, you can fry them in a hot pan for about four minutes on each side.

Original recipe taken from here.